Woocommerce Integration
This page explains how to seamlessly integrate Paycoinly with your Woocommerce store using the official Paycoinly plugin. With this approach, there's no need for manual setup, such as adding webhooks or embedding Paycoinly UI elements - everything is fully automated and handled directly through the plugin.
Payments triggered when your customers click Place order button on the checkout page are executed with the configurations you make here.
Prerequisites
Before continue, ensure you have the following:
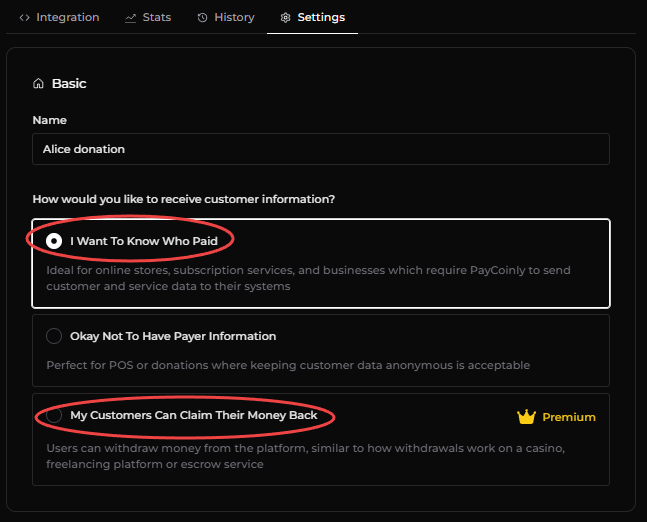
- How would you like to receive customer information? is set to either I Want To Know Who Paid or My Customers Can Claim Their Money Back in Payments > Settings > Basic
Configure Woocommerce options
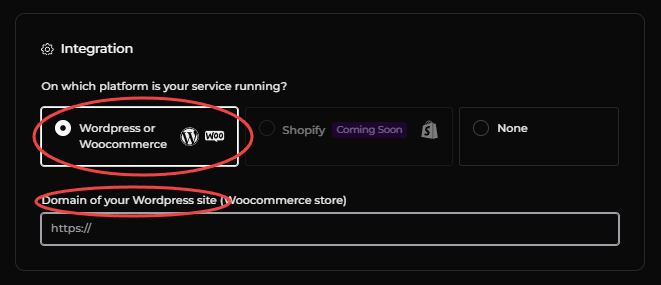
Navigate to Payments > Settings > Integration, select WordPress or WooCommerce, and enter the domain of your Woocommerce store.
Install and configure Paycoinly plugin
- Install Paycoinly plugin in your Wordpress admin dashboard.

- Navigate to Paycoinly in Woocommerce Payments page.
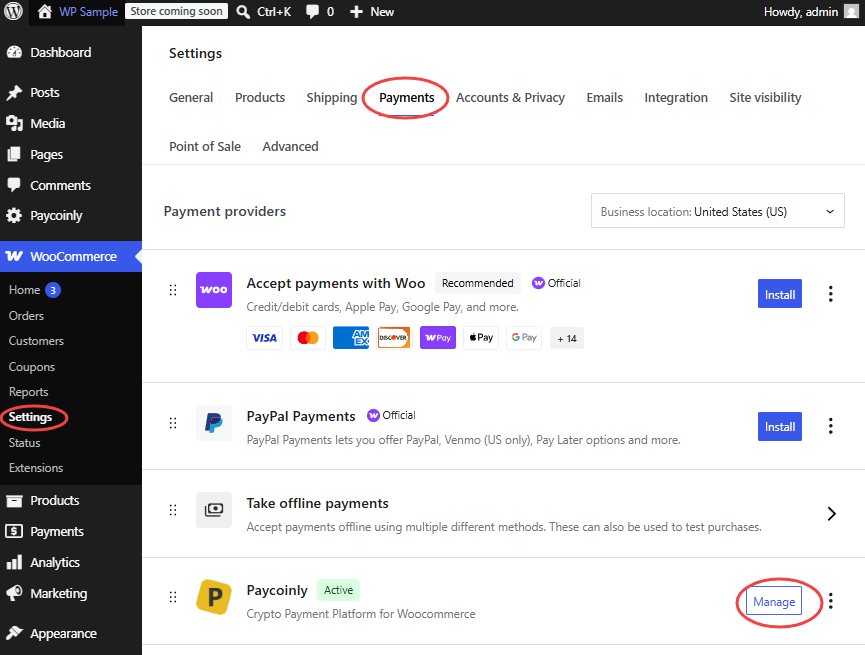
-
Check Activate Paycoinly Gateway in Woocommerce and provide API Key. Please check this page to get API key in your Paycoinly dashboard.
-
Select a payment in Payments section. All customer payments from your store will be routed to it.
If you see some payments disabled, it's because they are not eligible for your store. You can select a payment in Paycoinly plugin which satisfies prerequisites and has the correct Woocommerce options configured.
- Click Save Changes button.
Plugin actions and filters
You can leverage actions and filters provided from the Paycoinly plugin to extend its functionalities on your own when your platform processes payments. Please check WP Plugin Hooks for more information.