Withdrawl Integration
Withdrawl Integration enables developers to connect Paycoinly withdraw service to their platform, allowing your users to seamlessly withdraw their balances from Paycoinly. This feature requires Premium subscrition.
Prerequisites
Before you can start withdrawl integration, ensure you have the following:
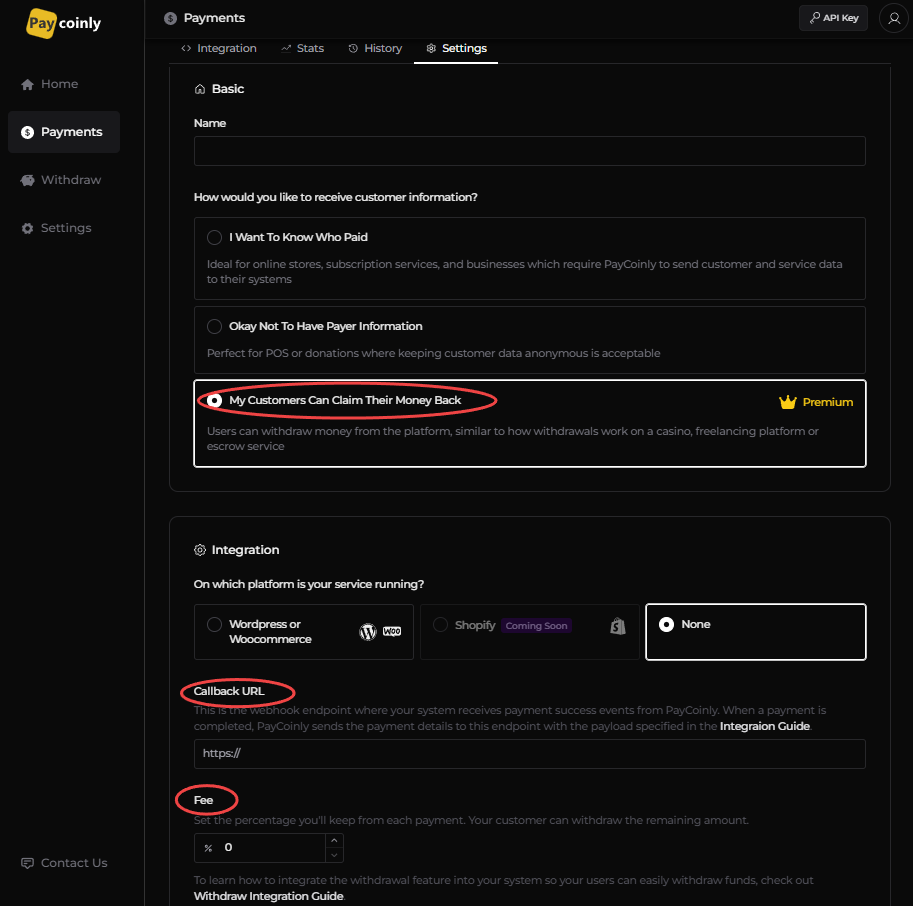
- How would you like to receive customer information? is set to My Customers Can Claim Their Money Back in Payments > Settings > Basic
- Provide value to Callback URL and Fee
Add a webhook to your backend
The webhook is a payment listener which will be triggered when your customer payment is completed. Please see implement details here.
Additionally you need to keep record of your user's claimable amount in your backend, and pass the user's balance when generating a withdraw token.
Add a backend endpoint to process withdrawl request
As the first among all others, you need to add a POST endpoint to your backend which does the following things:
- handle the withdrawl logic
- ask Paycoinly to make a withdrawl request so that your customers can finalize their withdrawl action using it
This endpoint will be triggered when implementing the Javascript integration described in the Add javascript code step.
Endpoint
Any route you want
Body
The endpoint expects the request body to contain the data specified below.
{
  chainId: string
  symbol: string
  amount: string
  value: number
  currency: string
  wallet: string
}
You can see the meaning of each field in the below table.
| Name | Description |
|---|---|
| chainId | Chain ID of the token |
| symbol | Symbol of the token |
| amount | Token amount in wei (or smallest unit) |
| value | Token amount value in currency |
| currency | Currency of value (Fixed to USD) |
| wallet | Wallet address the user will withdraw to |
chainId and symbol should be the one you get from Getting Customer Balances API in Check customer balances step.
Implementation
- Ensure the withdrawal amount (or value) in the payload does not exceed the user balance in your system.
- After validation, send a withdrawl request to Making Withdrawl Request API.
- If the response is successful (200), deduct the specified amount from the user's balance in your system.
Initiate withdrawl process
When your user initiates a balance withdrawl, your backend needs to perform following tasks.
Check customer balances
Check balances of your customers combined by making request to Getting Customer Balances API in your backend.
The API responds with a list of coins and their respective balances.
The response includes token data like chainId, symbol which need to be used in the next step.
Get withdrawl token
Your backend should then call the Withdrawl Token Generation API using your user ID initiating the withdrawal, along with his/her balance information stored in your system.
You should use the same chainId and symbol as the one you retrieved in the previous step when passing the balance information to the API.
The API returns a withdrawal token, which is used to link and launch the Paycoinly Withdrawl UI in the next step.
It is the responsibility of your system to maintain and track the withdrawal eligibility of each user. Paycoinly does not store or manage individual user balances within your platform; it only maintains the aggregate balance of all your users combined. Therefore, when generating a withdrawal token, your backend must provide the user's available balance to Withdrawl Token Generation API.
Also see how to record users' withdrawable balance in your system.
Implement frontend
Add a withdraw UI to your frontend
Show the withdraw UI to your users using the following URL
https://app.paycoinly.xyz/claim/{token}
where token is the withdraw token obtained from the previous step.
Here is a sample HTML snippet that you can use to embed the withdraw UI.
- Light
- Dark
<button onclick="window.open('https://app.paycoinly.xyz/claim?token={token}', 'Withdraw with PayCoinly', 'width=800,height=550,left=200,top=100');">
  <img src="https://app.paycoinly.xyz/logo/light.svg" style="width: 150px;" />
</button>
<button onclick="window.open('https://app.paycoinly.xyz/claim?token={token}', 'Withdraw with PayCoinly', 'width=800,height=550,left=200,top=100');">
  <img src="https://app.paycoinly.xyz/logo/dark.svg" style="width: 150px;" />
</button>
Add Javascript code
Add the following Javascript to your frontend to interact with the withdrawal UI.
window.addEventListener('message', (event) => {
  if (event.origin !== 'https://app.paycoinly.xyz') {
    return;
  }
  if (event.data.type === 'PAYCOINLY_REQUEST_WITHDRAW') {
    console.log(event.data.payload);

    // make a request to your backend with event.data.payload
    fetch('/process/withdrawl-request', { method: 'post', body: JSON.stringify(event.data.payload) })
      .then(() => {
        console.log('Withdrawal request processed successfully');
      })
  }
});
The message event delivers a payload in event.data.payload, which includes the withdrawal details selected by the user.
Upon message acceptance, make a call to Process withdrawal request endpoint, which you configured in the very first step, with the payload to submit a withdrawal request to PayCoinly.
Best practices
This section also describes best practices for implementing withdrawl integration.