Payment Token Generation
Your backend should call this endpoint in Get a payment token step, and the token will be used to display Paycoinly payment UI on your customers' side as described in Manual Setup page.
Endpoint
https://app.paycoinly.xyz/v1/pay/{payment-id}
It is a POST request.
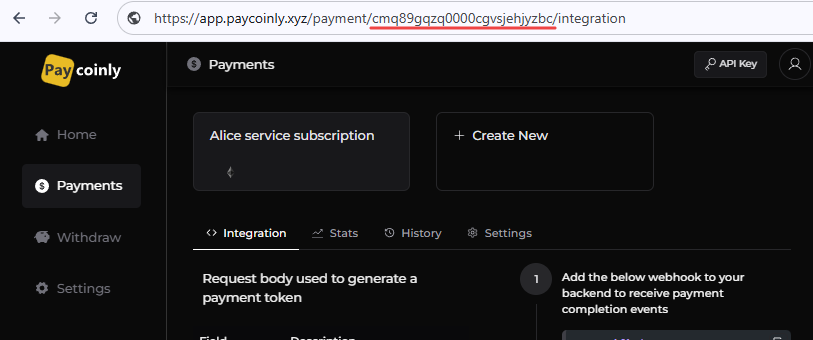
To see payment-id, navigate to the corresponding payment in the Paycoinly dashboard > Payments - the ID will be visible in your browser's URL.
Headers
{ "x-api-key": "<api key>", "content-type": "application/json" }
The request should include x-api-key in its header.
Please check this page to get API key in your Paycoinly dashboard.
Body
You can customize the request body to fit your specific business requirements, and you can see its syntax below.
{
  price: string
  currency?: string
  localCurrency?: string
  metadata?: {}
}
You can see the meaning of each field in the below table.
| Field | Mandatory | Default | Description |
|---|---|---|---|
| price | Yes | Service price - a numeric value representing the cost of the service | |
| currency | USD | Currency in which price is specified. Refer to currency list page. | |
| localCurrency | USD | price will be shown in local currency on user's side. Refer to currency list page. | |
| metadata | Callback URL will receive a request with this JSON value set in its body |
Response
{ "token": "<value>" }
Use this token to show Paycoinly payment UI on your frontend code showing to your customers.
Example
Below is an example of how to make a request to the endpoint using Node.js.
async function generatePaymentToken() {
  const response = await fetch('https://app.paycoinly.xyz/v1/pay/{payment-id}', {
    method: 'POST',
    headers: {
      'Content-Type': 'application/json',
      'x-api-key': '{x-api-key}'
    },
    body: JSON.stringify({
      price: 100.00,
      currency: 'USD',
      localCurrency: 'EUR',
      metadata: {
        orderId: 'abc123',
        customerId: 'user789'
      }
    })
  });

  if (!response.ok) {
    throw new Error(`HTTP error! Status: ${response.status}`);
  }

  const { token } = await response.json();

  return token;
}